08 tra Smile!- first program for micro:bit
The micro:bit can be programmed in multiple programming environments (like MakeCode, Python, JavaScript, and others) without needing additional software. This guide showcases programming examples using Microsoft MakeCode. Microsoft MakeCode is a graphical interface where code blocks are created by dragging and dropping blocks that connect with each other.

To get started, you’ll need:
- micro:bit v2 microcontroller (if you currently don’t have a micro:bit, you can check your programming results on the simulator included in the MakeCode interface for creating programs for micro:bit),
- micro USB cable to physically connect the micro:bit with the personal computer you are programming on,
- a computer,
- internet access.
To begin creating a program, open the page makecode.microbit.org and start a new project within the Microsoft MakeCode programming environment by clicking on New Project. On this page, you can easily and quickly access all your projects without additional storage on your own computer. Also, you can load pre-made programs by clicking on Import.

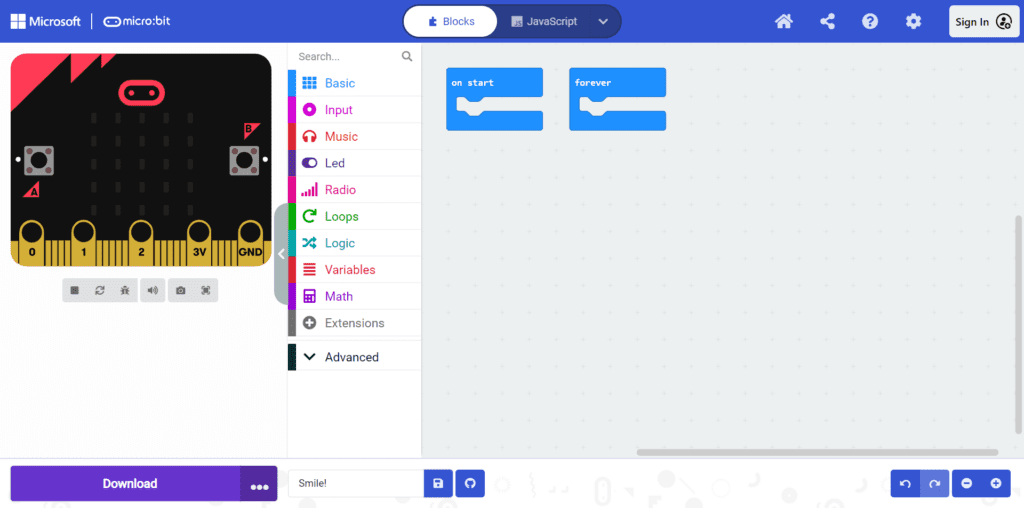
Before creating the program, next to the Download option, there’s a space where you will write the name of the program you’re currently creating, in this case, the program will be called Smile!. When opening a new project, the blocks on start and forever will already be in the programming space. You can delete them by right-clicking the command and selecting delete.
On the left side, there’s a micro:bit simulator. The simulator displays the current program you’re creating, and you can immediately notice changes during the program’s creation. You can stop and restart the simulation.
In the middle, there’s a menu with the main categories of commands used in programming. By clicking on each of these categories, a list of commands in the form of blocks opens, and they are placed in the programming space by dragging them with the mouse.
On the right side, there’s a grey area where the program is created by dragging and dropping code blocks that connect with each other.

1.
From the Basic command group, select the on start block and drag it into the program creation space if the command was not already placed. All commands placed within the on start block will execute when you turn on the micro:bit and will not repeat.
2.
Inside the on start block, place the show leds command to display a smiley face. Click on the squares to draw both eyes, nose, and mouth of the smiley.
After completing the program, check on the simulator if the program executes as you wanted. When you are satisfied with the created program, you can download and transfer it to your micro:bit device. Click on Download located at the bottom. Following window will show up: connect the micro:bit to the computer using the micro USB cable you received with the device and click Next.

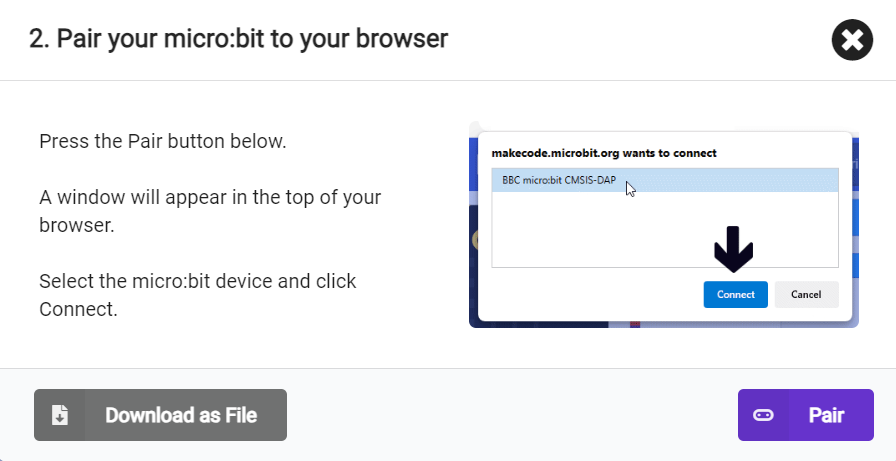
Now you have 2 options – Download as File or Pair.
Pairing your micro:bit with MakeCode editor makes it easier to download projects directly to micro:bit, just follow the instructions after clicking Pair option. If you choose to Download as File, transfer the downloaded program (microbit-Smile!.hex) to the micro:bit device shown in This PC.
Notice that the LED on the back of the micro:bit flashes, indicating that the program is successfully transferring to the micro:bit. When the LED stops flashing, the created program starts executing.
Transfer the downloaded program (microbit-Smile!.hex) to the micro:bit device shown in This PC. Notice that the LED on the back of the micro:bit flashes, indicating that the program is successfully transferring to the micro:bit. When the LED stops flashing, the created program starts executing.
If you want to add a previously made project that is on your computer, you can add the project using the Import option. Pressing Import will open the following window offering two options: loading a file from your computer, loading a project via a link found on the Internet or creating your GitHub repository.

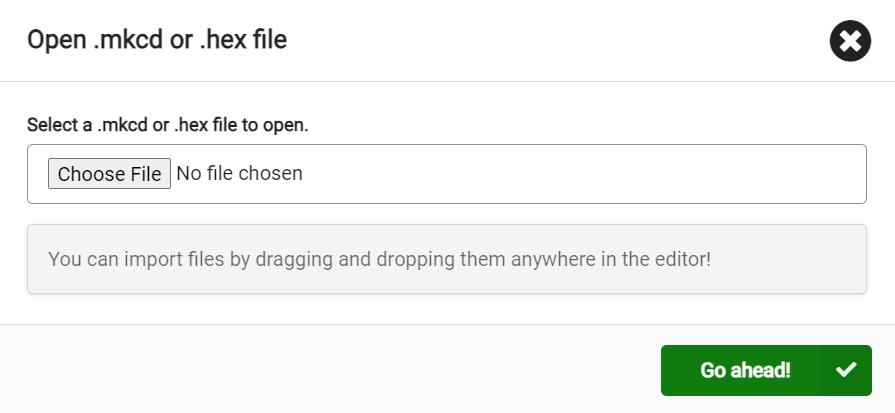
Select Import File…. Choose Choose File within the Open .mkcd or .hex file window. A new window will open where you must find the file you want to load. After finding the desired file, select Go ahead!.
If you have successfully loaded the project, the MakeCode programming environment with your loaded project will open.
Below you can find five video materials on how to open MakeCode editor, connect the micro:bit with a computer and export/import micro:bit programs.
This publication reflects the views only of the author, and the Commission cannot be held responsible for any use which may be made of the information contained therein.